Windows 10 Proxy Server Setup Tutorial

Setting up proxies on Windows 10 is a common task that can help protect your online privacy, bypass geographical restrictions, or connect to internal networks in a workplace. Whether you're new to using proxies or need to update your settings, this tutorial will guide you through the process on Windows 10.
Setting up HTTP Proxies
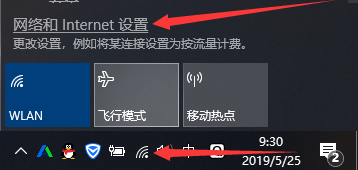
1. Open Network and Internet Settings
(1) Click the network connection icon on the bottom right of the desktop (2) Click on the Network and Internet settings option
2. Set Up Proxies
(1) Click on Proxies
(2) Toggle the option to use a proxy server to 'On'
(3) Enter the IP and port
(4) Click save

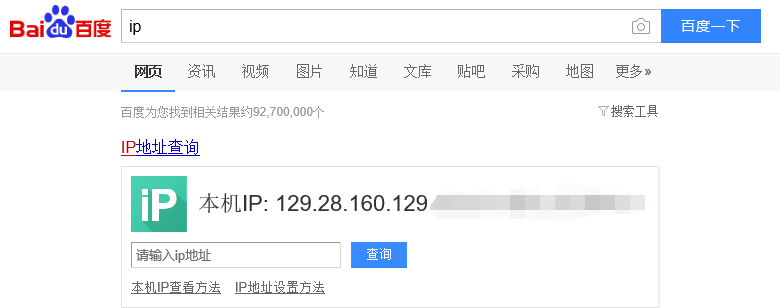
3. Confirm Proxy Success
Open a browser, search for your IP, and check if it matches the proxy IP you set. If it matches, the setup is successful.
4. Cancel Proxies
Turn off the proxy server option.

Setting up SOCKS Proxies
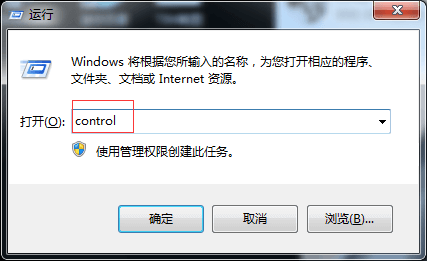
1. Open Control Panel
Press Win+R to bring up the Run interface (as shown below), type "control" and hit Enter
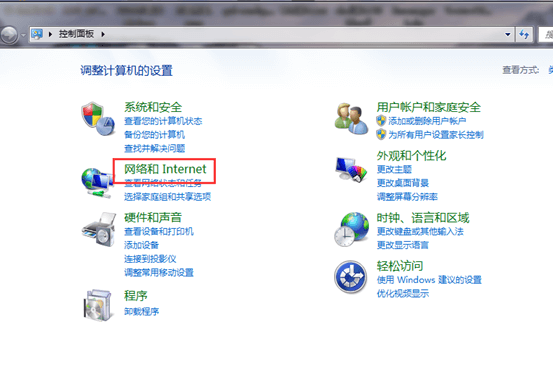
2. Click on Network and Internet
3. Internet Options - Connections - LAN Settings
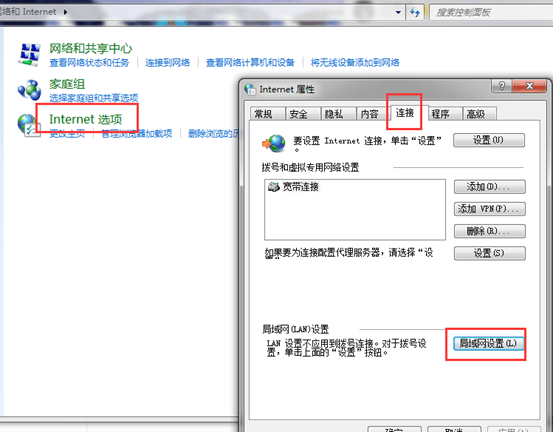
4. Set Proxies
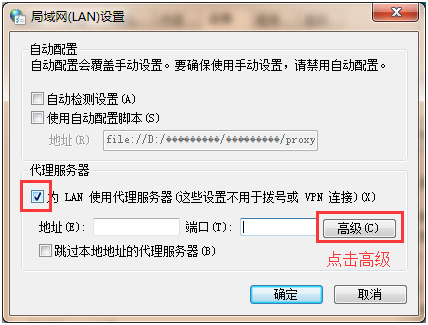
- Check the box for 'Use a proxy server'
- Click Advanced to enter detailed settings
5. Set SOCKS Proxies
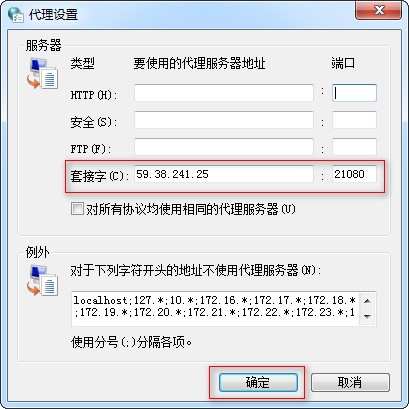
- Socket settings are for SOCKS proxies
- Enter the proxy server IP address and port number
- Click OK, then back to the previous screen and click OK again to complete the setup
To cancel the proxy setup, simply uncheck the proxy server box.
Setting up proxies on Windows 10 is a relatively straightforward task, but it is crucial to ensure that the proxy information you provide is accurate. This information is typically provided by your proxy service provider, so be sure to keep it secure for future use. Proxies can help protect your privacy, bypass geographical restrictions, or connect to internal networks, making them extremely useful tools in certain scenarios.
Windows 10 Proxy Server Setup Tutorial review FAQ

Explore the best Shopee proxie...

rotating proxies and rotating ...

This article will introduce th...

Explore the best Telegram Prox...