How to Set Up a Proxy in Internet Explorer

In everyday web usage, sometimes we need to use proxies to access specific websites or protect our online privacy. Setting up a proxy in Internet Explorer is a common procedure. Here’s how to configure your proxy settings in Internet Explorer:
The setup in Internet Explorer can be done in the following steps:
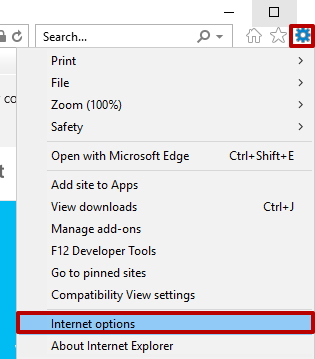
- Click the gear icon in the top right corner, then click the “Internet Options” button.
- In the window that opens, click the “Connections” tab, then click “LAN settings”.

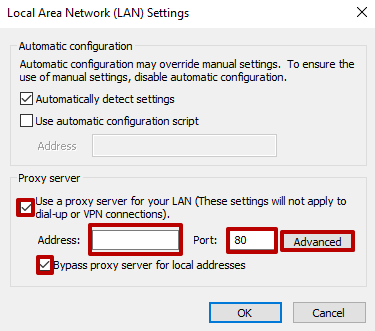
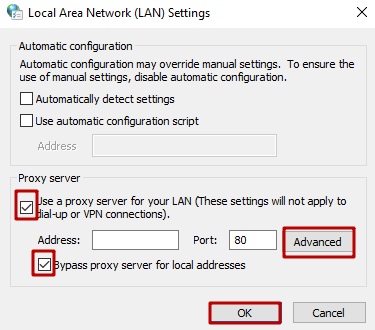
- In the “LAN Settings” window, check the boxes for “Use a proxy server for your LAN” and “Bypass proxy server for local addresses”. Enter the details of the proxy you have purchased, which can typically be found in the order confirmation from your proxy provider. After entering the required information, click the “Advanced” button.
- In the opened “Proxy Settings” window, if data is not automatically entered, enter it again and check the box for “Use the same proxy server for all protocols”.
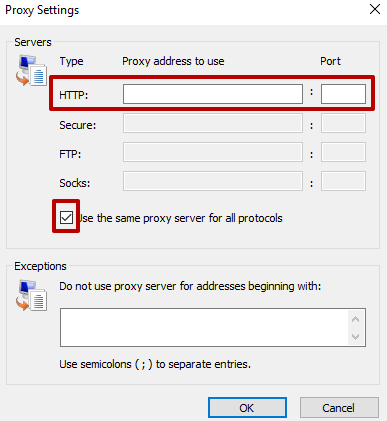
- Click “OK” in all windows to save all settings.
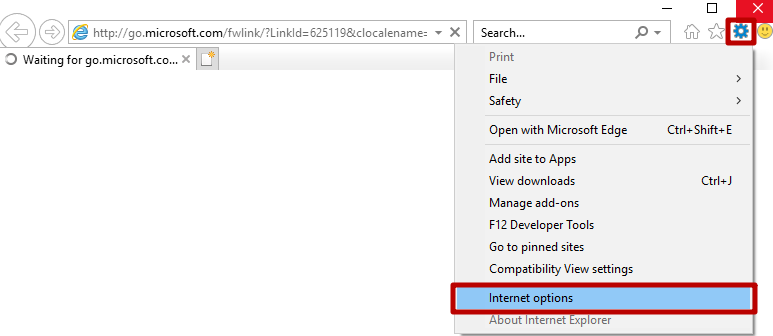
- If your proxy requires authorization with a username and password, you will need to enter some content in the browser’s search field; an authorization window will open, and you must enter the necessary data.
Configuration is complete.
You can now use your proxy. Occasionally, problems may arise with disabling the proxy in Internet Explorer. Reasons for this might include:
- Changing network settings;
- The presence of a virus;
- Opening access to software on the network;
- Changing existing LAN settings.
This process is not complicated. You just need to follow the instructions and all suggestions.
Disabling the Proxy in Internet Explorer
- In work mode, go to the browser's network settings, "Settings" - "Internet Options":
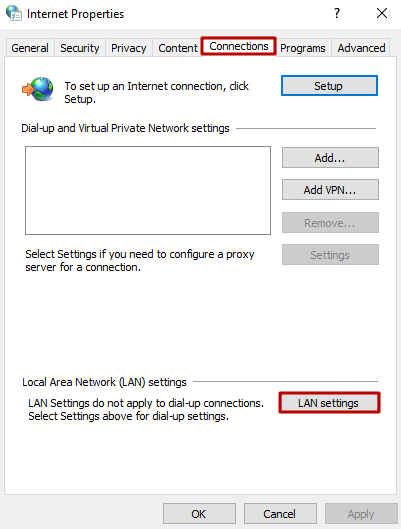
- In the opened "Internet Properties" window, select the “Connections” tab and then click the “LAN settings” button:
- In the opened “LAN (Local Area Network) Settings” window, uncheck the boxes for “Use a proxy server for your LAN” and “Bypass proxy server for local addresses”, then click “OK”:
If the internet connection does not restore after disconnecting the proxy, you may need to correct errors in the TCP/IP settings.
Configuring IP Allocation
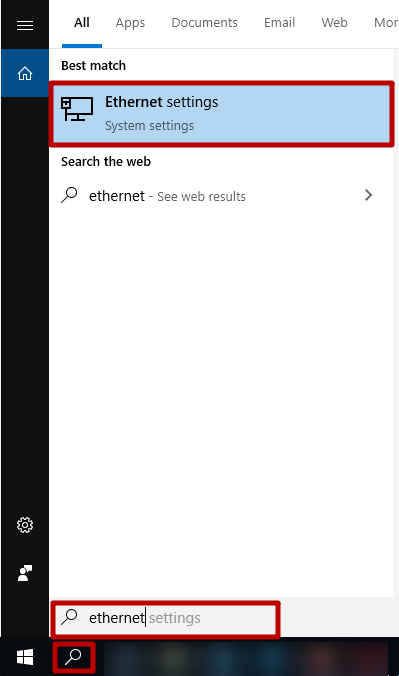
- Open the search field and enter “Ethernet settings”:
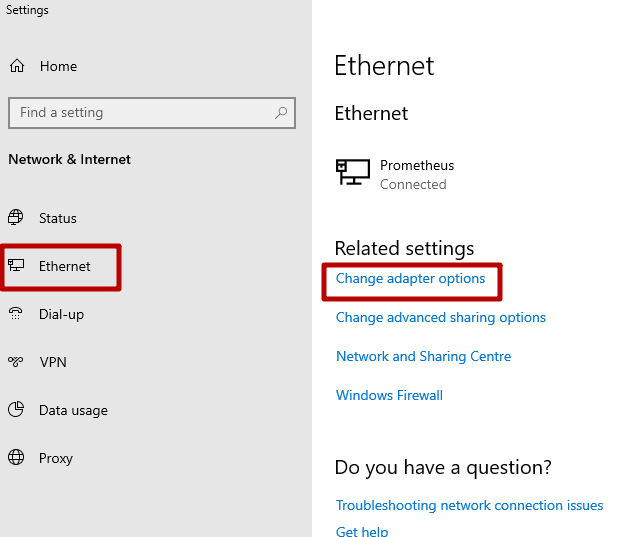
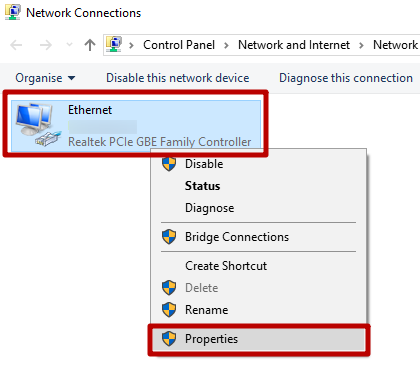
- Then, in the “Ethernet” menu, click “Change adapter settings”:
- Open the properties of your internet connection:
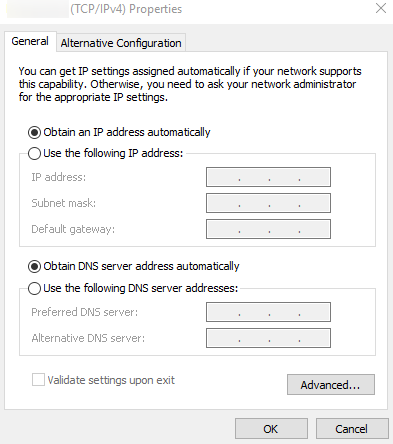
- Open the properties of the required protocol and switch to automatic mode to obtain the IP address and DNS server address. Click “OK”:
Other Suggestions
Following the instructions, you can disable the proxy server independently and efficiently. However, considering some tips for completing this process is important:
- Disable “QoS Packet Scheduler” in network adapter settings;
- Note that the menu interface directly depends on the version of the operating system;
- Do not disable changes to any parameters protecting the system.
After completing all recommendations and eliminating the reasons for the proxy server disconnection, you can repeat the configuration process according to the rules mentioned above.
By following these steps, you can successfully set up a proxy in Internet Explorer, allowing you to access the internet through a proxy. If you encounter any issues during the setup process, consider contacting your proxy service provider or consulting Internet Explorer's help documentation for further assistance.
How to Set Up a Proxy in Internet Explorer review FAQ

For businesses and individuals...

Explore the best Shopee proxie...

As a secure and fast instant m...

rotating proxies and rotating ...